
So you have tons of trading card game cards kicking around like Magic: The Gathering or Pokemon, and they’re gathering dust.
If you ever thought, “hey, they would look pretty cool on my Christmas/Yule/Chrismukwanzaakah tree,” then this is the tutorial for you.

Materials
3 Playing cards per bulb (or equivalent card stock if your cards are too precious)
Straight edge (preferably something sturdy with measurement markings)
Cutting mat
Craft knife/rotary cutter/scissors
Hard thin pencil (if using scissors to cut)
Embroidery thread, waxed thread, beading wire, etc. (something to string it up with)
Wire snips (if using beading wire)
2 beads per bulb (optional, you can do more if you wish)
Awl
Sewing needle/beading needle
Permanent marker (optional)
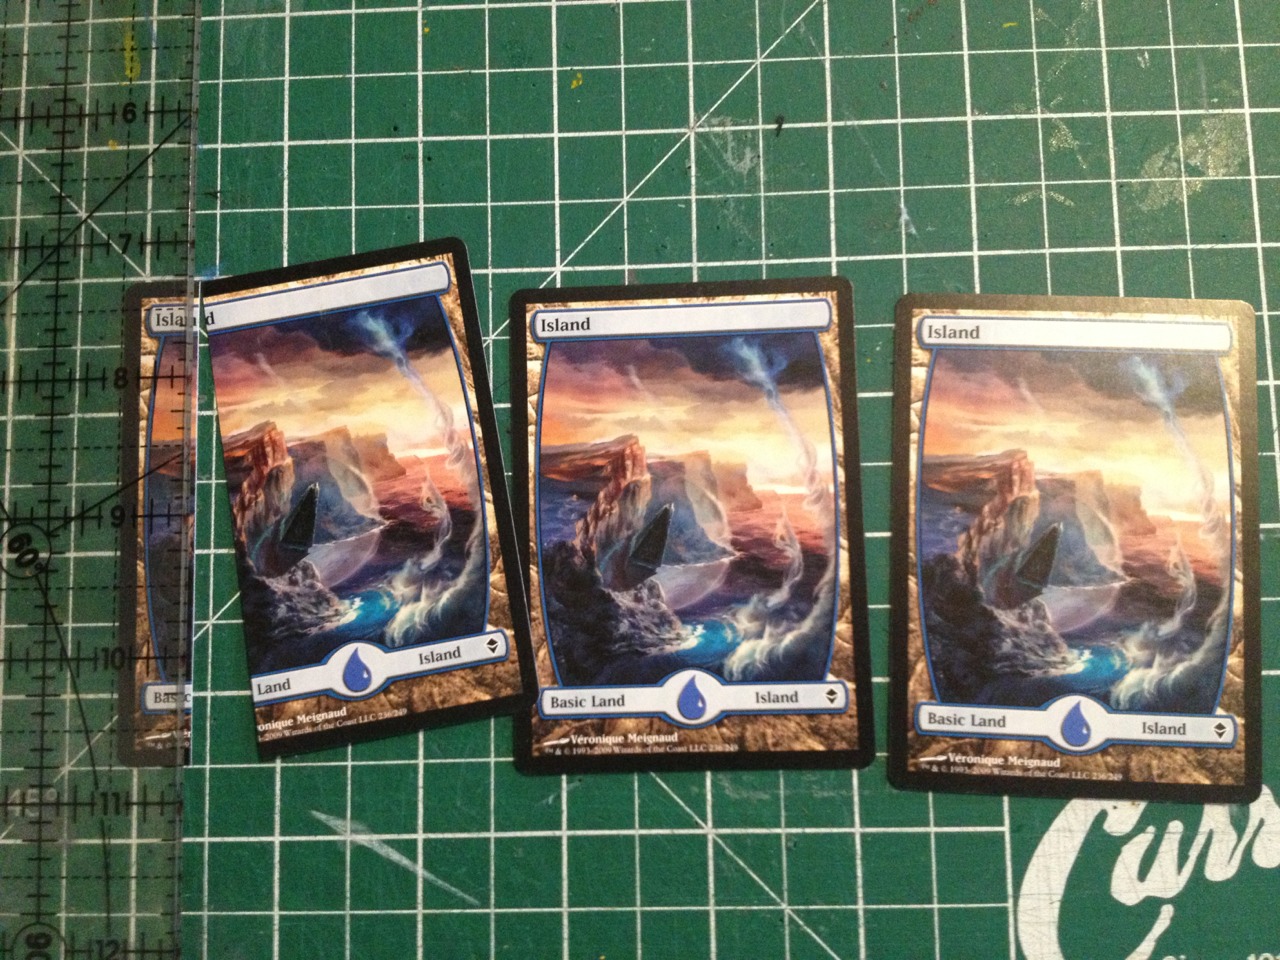
1. After selecting your cards, cut them into 4-5 equal strips. Since most playing cards are 2-1/2″ wide, I am cutting them into 1/2″ strips. Optional: use permanent marker to colour the edges of your paper strips.
2. Arrange your strips in the order you want them on the bulb.

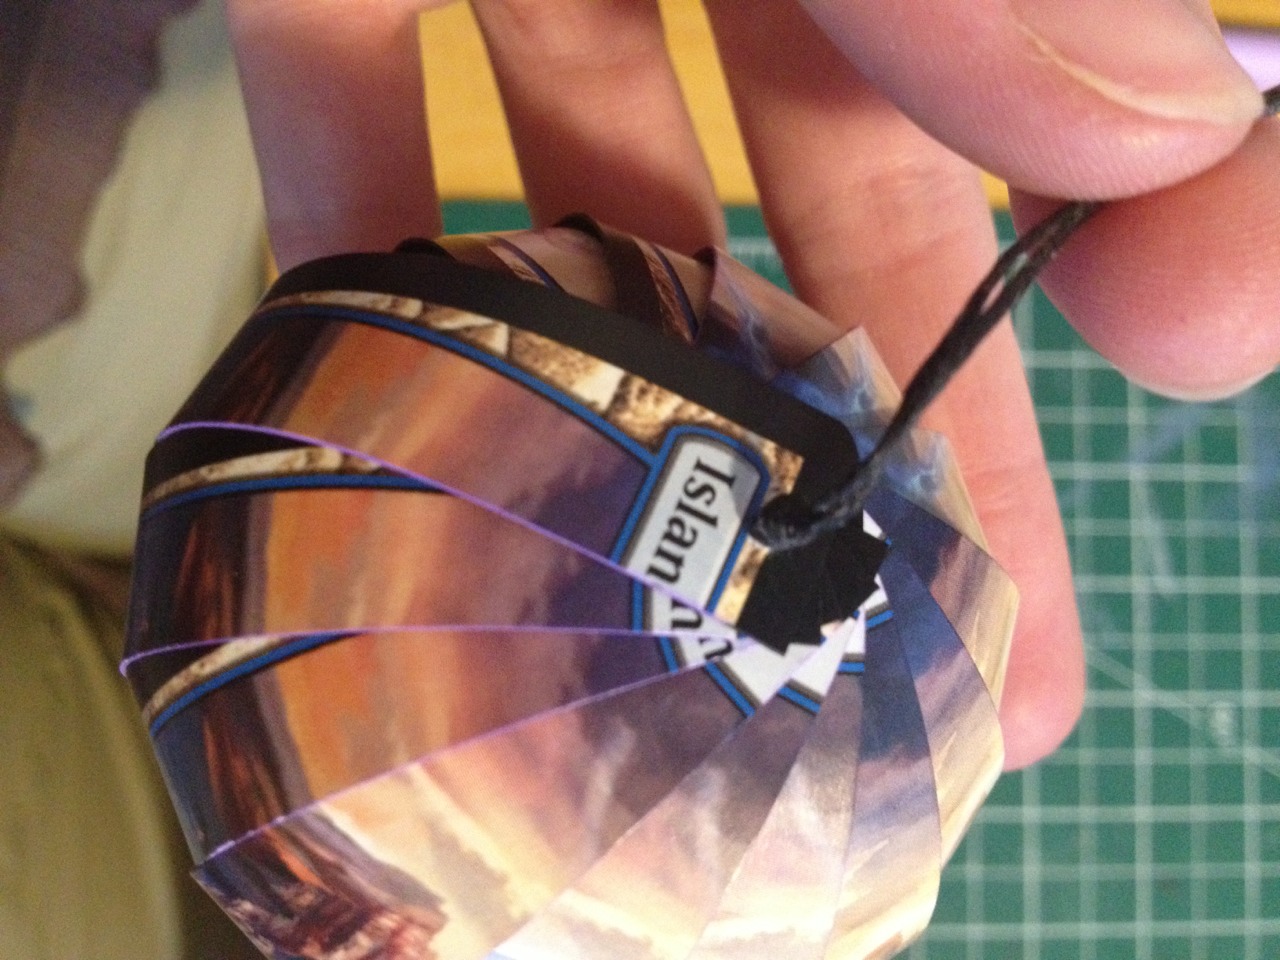
3. Use your awl to poke a small hole at the top and bottom of each piece. This should be centred and only 1/8″ from the edge.

4. Starting from the right side of your picture, starting threading your pieces onto your thread/wire. You will want to securely knot the thread first and put on your decorative bead first. You can use a twisted piece of wire if you don’t have a skinny enough needle or beading needle to fit through your beads and card holes.

5. Pull tight and knot your thread once all pieces are on.

6. Start threading on the top of your card pieces. Start with the same card you began with in step 4. The bulb should begin to take shape. Optional: you can put a knot in your thread to mark how tall you want your bulb to be and snug your pieces against that.

7. Keep going until you have all pieces on. Snug them down into a shape you like as you go. it will look a bit like a shell.

8. Pull your pieces together snugly and put in a good knot to stop them from springing out of shape.
9. Pop a bead on that with another securing knot, and create your loop.If using beading wire, you can twist a small loop and then pop some ribbon through for dangling.
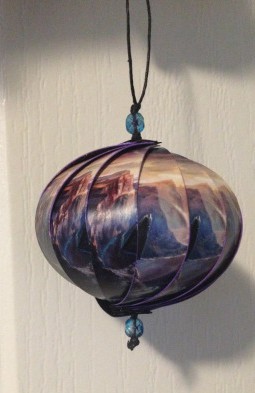
Congrats! You’ve made a bulb. Now make more and wow/traumatize your friends. 🙂
